How to Upgrade a Fluorescent Troffer to LED
LED troffer upgrade kits are the fastest, simplest way to convert your fluorescent troffer lighting to LED. You don't even need to remove the fixture from the ceiling to convert it to LED, and the process should take less than ten minutes per troffer once you know what you're doing.
What you need: • A fluorescent-to-LED troffer retrofit kit. • Wire cutters. • Wire nuts (approx. 4). • Electrical tape. • G13 sockets to replace any broken sockets.
Instructions:
1. Make sure all power to the fixtures is OFF at the circuit breaker
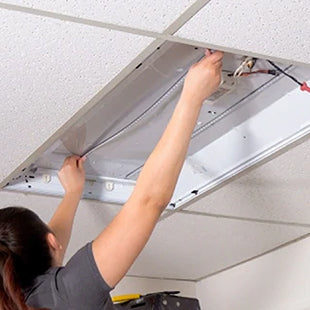
2. Unhook the latches on the troffer cover. The cover swings downward to open:
3. Remove the fluorescent tubes.
4. Remove the wiring compartment cover to expose the ballast and wiring.
5. Rewire your ballast per the diagram appropriate to your ballast type below. (If you don't know which type of ballast you have, see How Can I Tell What Kind of Ballast My Fluorescent Fixture Has?)
6. Install your new LED tubes, paying attention to the markings at the ends of the tubes.
7. Before you close the troffer, remove the old diffuser and replace it with the new diffuser that came in your LED troffer retrofit kit—this adds the finishing touch to make your fixture feel like new.
8. Close the troffer and reconnect the power.